
Highland OrderFlow
Initial Configuration
User Guide
📺 Setting-up and managing displays
Display Management controls how OrderFlow is presented on the screens used by your team.
A Display Profile can be configured for a particular operational role, location or screen — for example a kitchen production screen, collection counter, delivery dispatch station or manager overview.
This allows multiple screens to use the same OrderFlow workflow while presenting only the information relevant to the people using each screen.
Each display can have its own:
Paired devices
- Location and access permissions
- Workflow stages and order filters
- Card layout and visible information
- Screen behaviour and kiosk settings
- Customer-facing options
- Branding
1. Opening Display Management
From the WordPress administration menu, go to:
OrderFlow → Displays
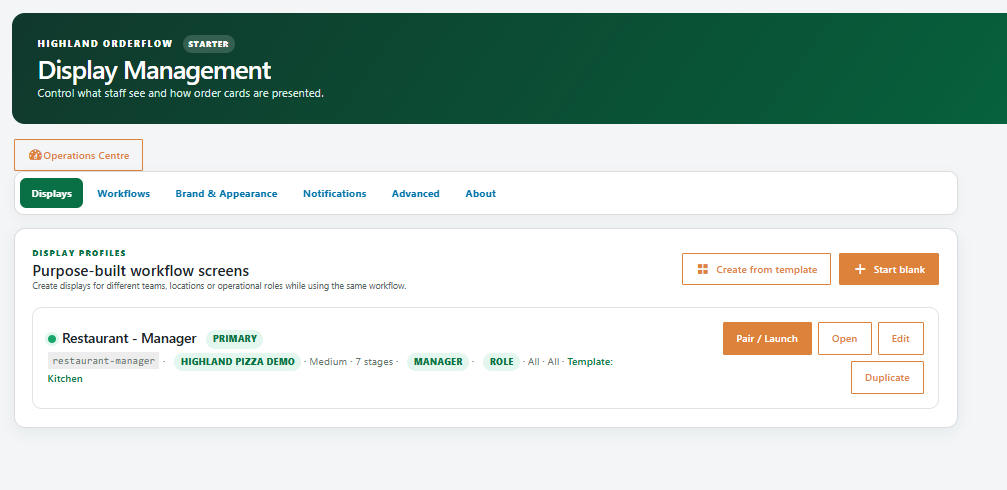
The Displays tab shows all Display Profiles currently configured in OrderFlow.
Each profile provides a summary of its configuration together with controls to Pair / Launch, Open, Edit or Duplicate the display.
In the example above, Restaurant – Manager is the primary display for the Highland Pizza Demo location.
Available actions
Pair / Launch
Opens the deployment screen where the display can be launched or paired with another device.
Open
Opens the operational display directly.
Edit
Opens the Display Profile settings.
Duplicate
Creates a copy of the profile. This is useful when another station requires similar settings.
You can also create a new Display Profile using Create from template or Start blank.
2. Creating a Display Profile
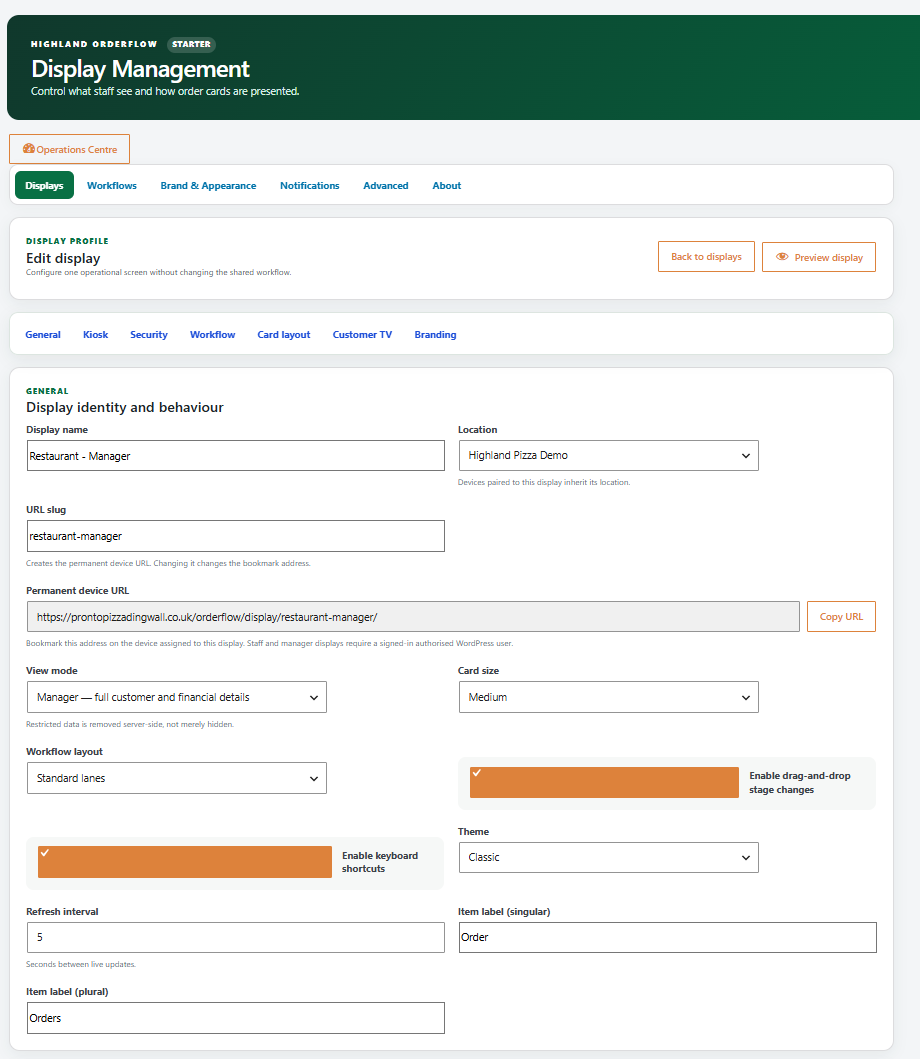
There are three useful ways to create another display:
Create from template
Choose Create from template to start with a configuration designed for a particular operational role.
This is usually the quickest way to create a new operational screen.
Start blank
Choose Start blank to create a Display Profile from scratch.
Use this when the required screen differs significantly from the supplied templates.
Duplicate an existing display
Choose Duplicate beside an existing profile when the new screen should use similar settings.
You can then edit the duplicate without changing the original display.
3. Creating a display from a template
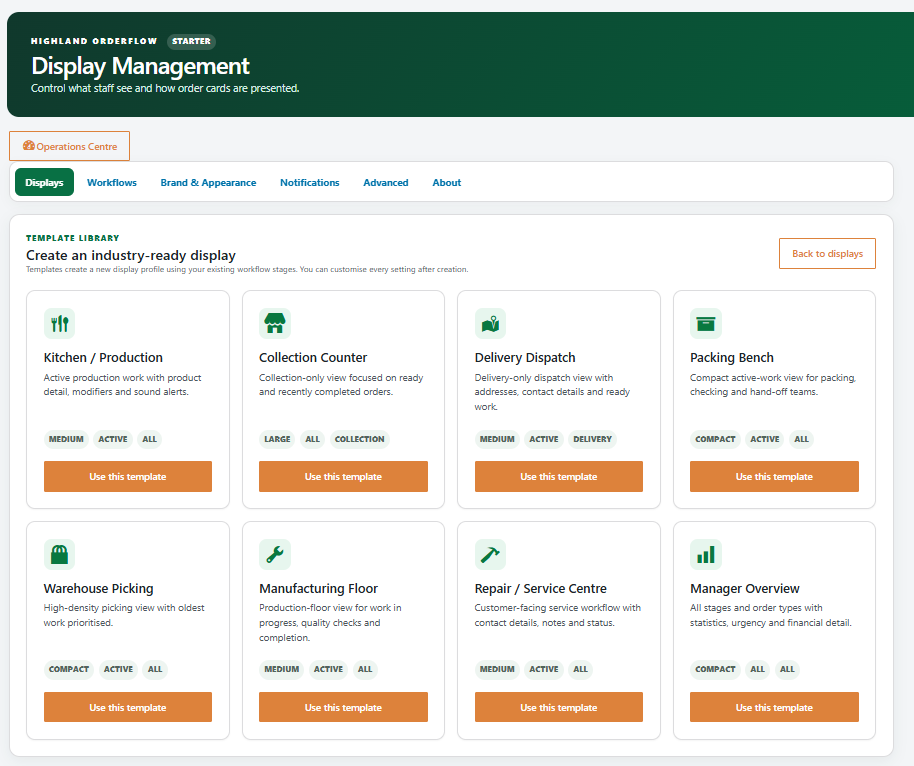
Select Create from template to open the Template Library.
OrderFlow Starter provides templates for several common operational environments.
Kitchen / Production
Designed for active production work, with product details, modifiers and sound alerts.
Collection Counter
A collection-focused display showing ready and recently completed orders.
Delivery Dispatch
A delivery-only dispatch view including addresses, contact details and ready work.
Packing Bench
A compact active-work display intended for packing, checking and hand-off teams.
Warehouse Picking
A high-density picking view prioritising the oldest work.
Manufacturing Floor
A production-floor configuration for work in progress, quality checks and completion.
Repair / Service Centre
A customer-facing service workflow including contact details, notes and status information.
Manager Overview
A broader operational view showing all stages and order types together with statistics, urgency and financial information.
Each template also shows its default characteristics, such as card size, workflow state and applicable order type.
Select Use this template beneath the required template to create the Display Profile.
Tip: Templates are starting configurations. The individual Display Profile settings can still be customised after the profile has been created.
4. Editing a Display Profile
Select Edit beside a Display Profile.
The editor is divided into:
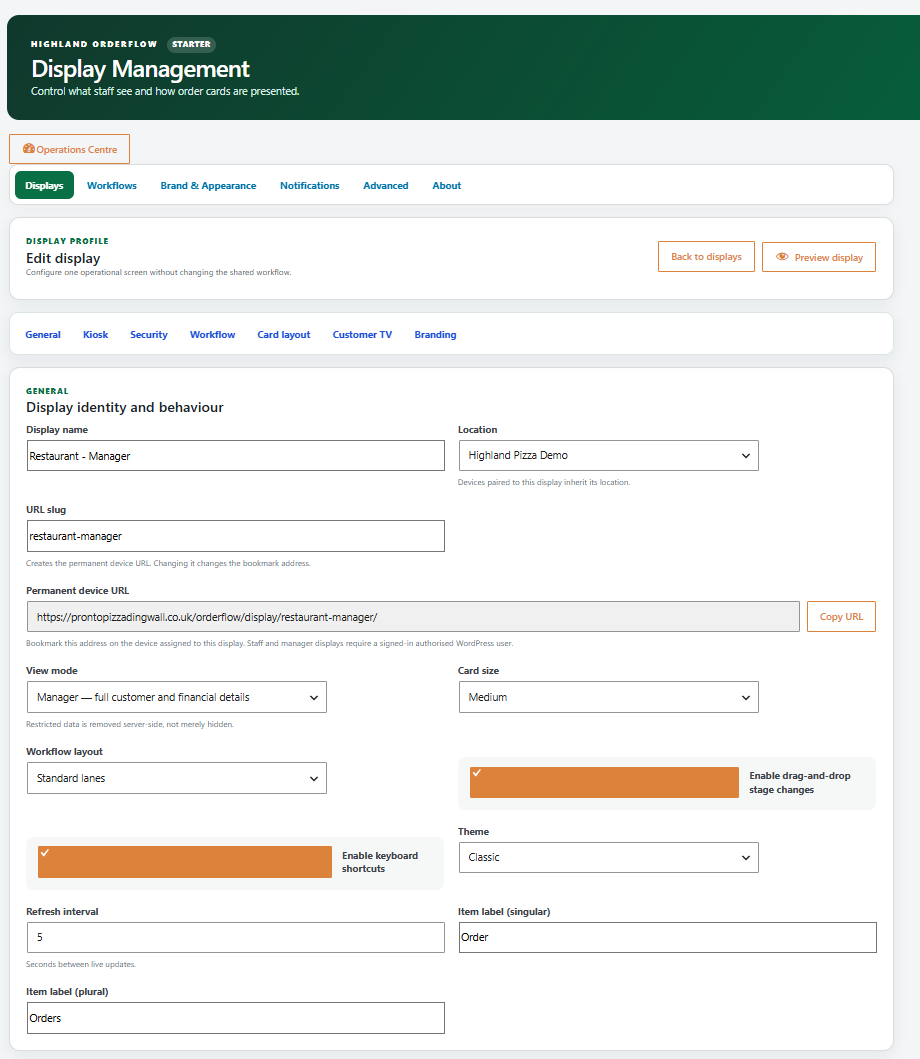
General · Kiosk · Security · Workflow · Card layout · Customer TV · Branding
These settings apply to this particular Display Profile. They allow the operational screen to be customised without changing the shared workflow itself.
5. General settings
The General section controls the identity and basic behaviour of the display.
Display name
Enter a descriptive name for the station.
Names such as Kitchen, Collection Counter or Restaurant – Manager make displays easier to identify when several profiles are configured.
Location
Assign the display to an OrderFlow location.
Devices paired with the display inherit its location.
URL slug
The slug forms part of the permanent address used to access the display.
Changing it also changes the address that has previously been bookmarked.
Permanent device URL
This is the direct address for the Display Profile.
Use Copy URL when the address needs to be transferred to the device that will run the display.
View mode
Controls the type of operational view and the level of information supplied to the screen.
For example, the screenshot shows:
Manager — full customer and financial details
OrderFlow notes that restricted data is removed server-side rather than simply being visually hidden.
Card size
Controls the size of order cards on the operational display.
The example profile uses Medium cards.
Workflow layout
Controls how workflow stages are presented.
The example uses Standard lanes.
Drag-and-drop stage changes
Enable this when operators should be able to move orders between workflow stages by dragging their cards.
Keyboard shortcuts
Enables keyboard controls for the display.
Theme
Selects the visual theme used by this Display Profile.
Refresh interval
Controls the interval, in seconds, between live updates.
The example is configured to refresh every 5 seconds.
Item labels
Item label (singular) and Item label (plural) control the terminology used by the display.
For a restaurant these might remain Order and Orders, while another type of operation could use terminology appropriate to its workflow.
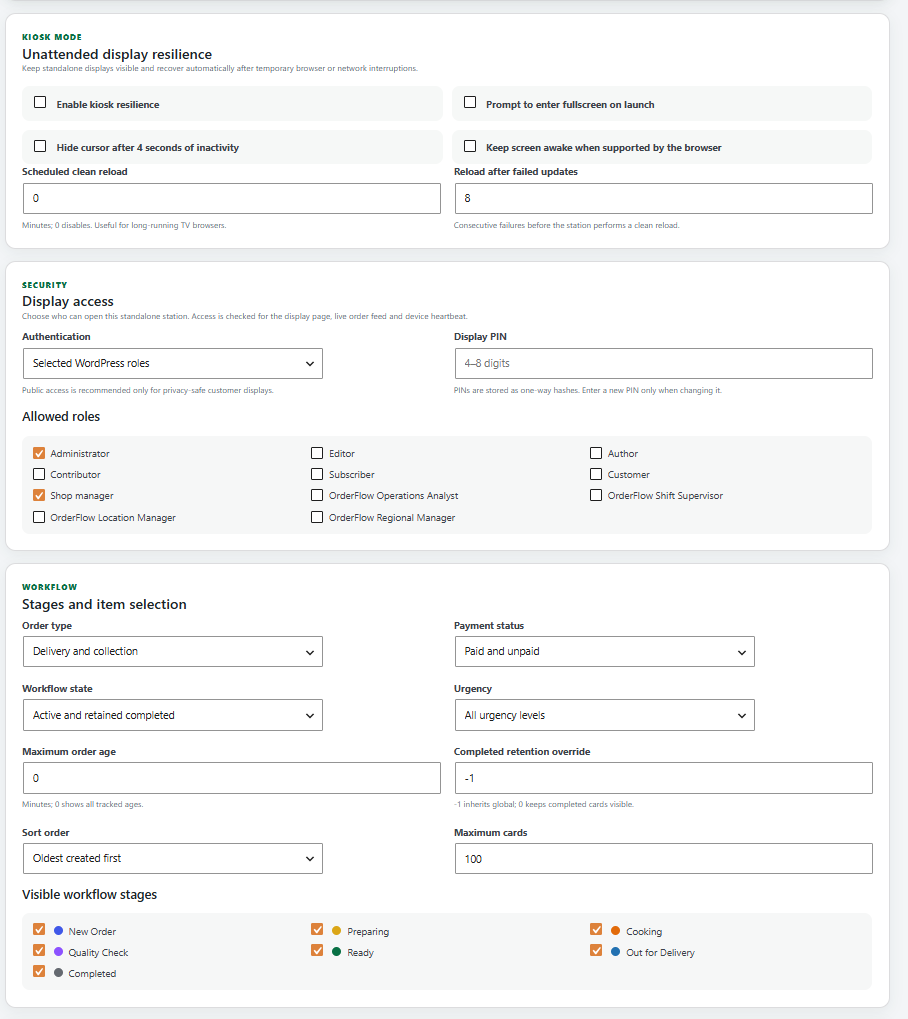
6. Kiosk mode
The Kiosk settings are intended for unattended or permanently mounted operational screens.
Available options include:
Enable kiosk resilience
Enables additional behaviour intended to keep a standalone display operational.
Prompt to enter fullscreen on launch
Prompts the operator to place the display into fullscreen mode.
Hide cursor after 4 seconds of inactivity
Useful for wall-mounted displays or screens that are not normally operated with a mouse.
Keep screen awake when supported by the browser
Attempts to prevent a compatible device from sleeping while the display is running.
Scheduled clean reload
Sets a scheduled reload interval in minutes.
A value of 0 disables scheduled reloads.
This can be useful for long-running TV or operational displays.
Reload after failed updates
Sets the number of consecutive failed updates allowed before the station performs a clean reload.
7. Display security
The Security section determines who can access the standalone display.
Authentication
Choose the authentication method required for the Display Profile.
The example is configured to use Selected WordPress roles.
Allowed roles
When role-based authentication is selected, choose which WordPress or OrderFlow roles are permitted to access the display.
Available roles shown include Administrator, Shop Manager and several dedicated OrderFlow roles.
This makes it possible to restrict operational displays according to staff responsibilities.
Display PIN
A 4–8 digit PIN can be configured for the display.
OrderFlow stores display PINs as one-way hashes. A new PIN only needs to be entered when changing the existing PIN.
Security: The interface recommends public access only for privacy-safe customer displays. Staff and management screens containing customer, order or financial information should be appropriately restricted.
8. Choosing which orders appear
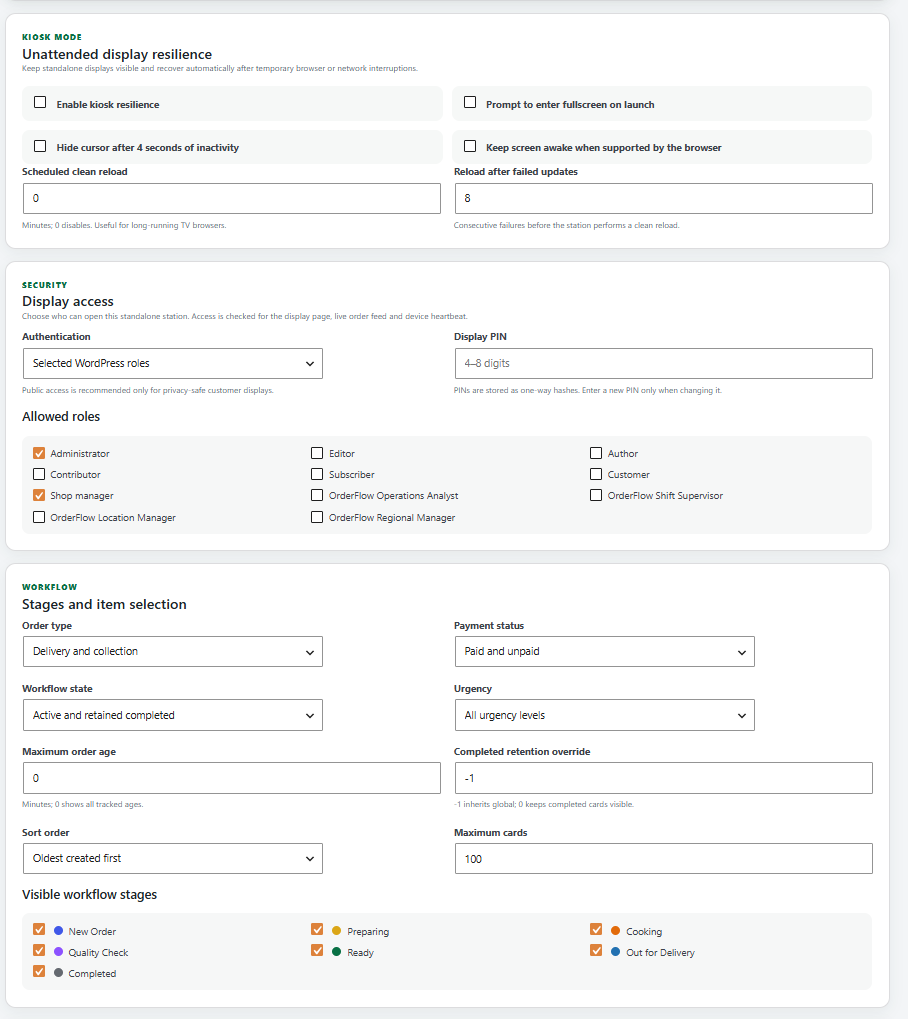
The Workflow section controls the orders and workflow stages shown by this Display Profile.
Order type
Choose which fulfilment types should appear.
The example uses Delivery and collection.
A specialised display could instead be configured around the appropriate order type.
Payment status
Controls whether the display includes paid orders, unpaid orders or both.
Workflow state
Controls which workflow states are included.
The example includes Active and retained completed work.
Urgency
Filters the display according to configured urgency levels.
Maximum order age
Sets the maximum age of work shown on the display.
A value of 0 shows all tracked ages.
Completed retention override
Controls how long completed cards remain visible for this Display Profile.
The interface defines:
- -1 — inherit the global setting
- 0 — keep completed cards visible
Sort order
Controls how cards are ordered within the display.
For example, Oldest created first prioritises orders according to when they were originally created.
Maximum cards
Limits the number of cards that can be presented on the display.
9. Choosing visible workflow stages
Under Visible workflow stages, select the stages that should appear on this particular display.
The example includes:
New Order · Preparing · Cooking · Quality Check · Ready · Out for Delivery · Completed
A display does not have to show every stage in the underlying workflow.
This is particularly useful when creating purpose-specific screens. For example, a production station could concentrate on active preparation stages while a collection screen could concentrate on orders approaching or reaching Ready.
Changing the stages displayed here changes the Display Profile; it does not require you to create a separate workflow.
10. Card layout and visible information
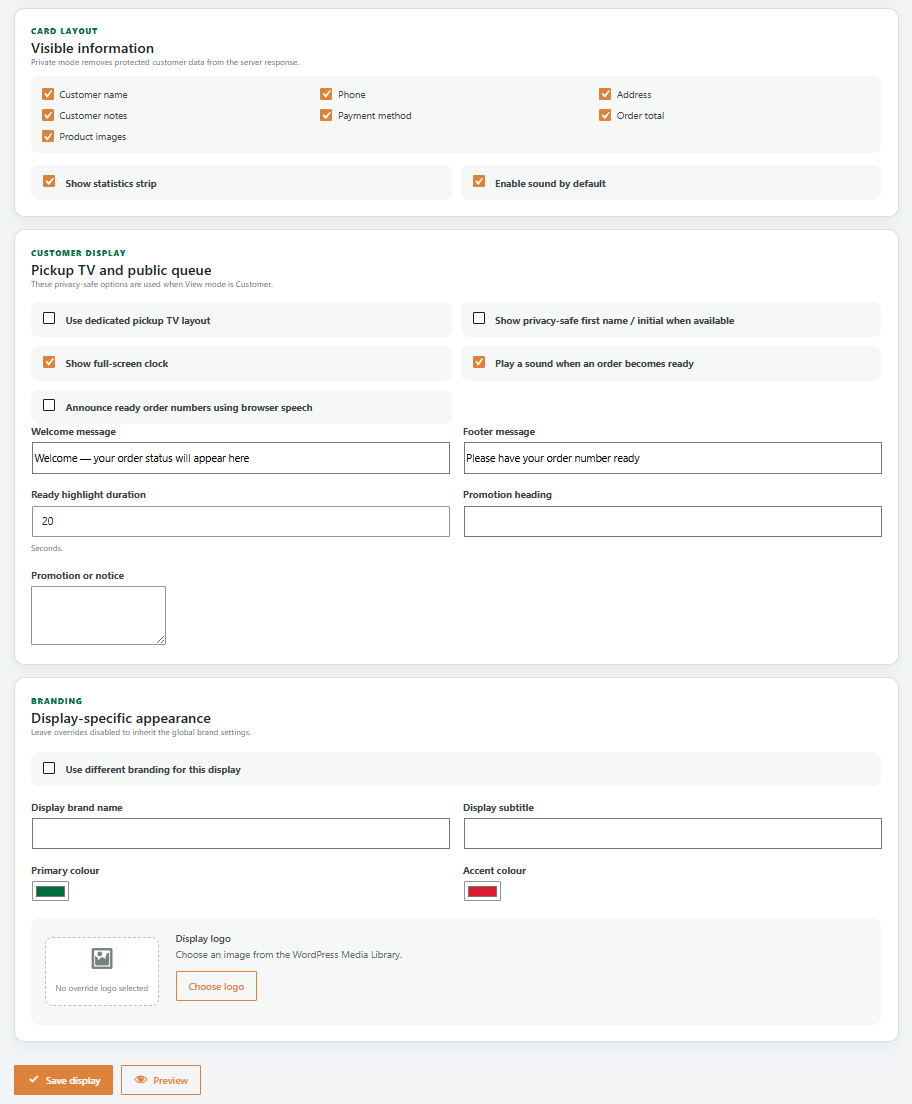
The Card layout section controls which order information is available on cards.
Available information includes:
- Customer name
- Customer notes
- Product images
- Phone
- Payment method
- Address
- Order total
Enable only the information that operators using this screen actually need.
The interface notes that privacy mode removes protected customer data from the server response.
Statistics strip
Enable Show statistics strip to include the operational statistics area on the display.
Sound
Enable Enable sound by default when the station should start with OrderFlow’s audible notifications enabled.
11. Customer TV and pickup displays
The Customer TV section provides privacy-focused options for screens intended to be visible to customers.
These settings are used when the display’s View mode is Customer.
Dedicated pickup TV layout
Enable Use dedicated pickup TV layout to present the screen as a customer pickup display rather than a normal operational workflow.
Privacy-safe customer names
Show privacy-safe first name / initial when available allows limited customer identification to be displayed where appropriate.
Full-screen clock
Enable Show full-screen clock to include a clock on the customer display.
Ready notification sound
Enable Play a sound when an order becomes ready to provide an audible notification.
Browser speech announcements
Enable Announce ready order numbers using browser speech if the device should announce ready order numbers using supported browser speech functionality.
Customer messaging
The display can also be customised with:
- Welcome message
- Footer message
- Promotion heading
- Promotion or notice
Ready highlight duration
Controls how long a newly ready order is highlighted.
The example uses 20 seconds.
These options allow a customer-facing collection screen to provide order progress without exposing the full operational information available to staff.11. Customer TV and pickup displays
The Customer TV section provides privacy-focused options for screens intended to be visible to customers.
These settings are used when the display’s View mode is Customer.
Dedicated pickup TV layout
Enable Use dedicated pickup TV layout to present the screen as a customer pickup display rather than a normal operational workflow.
Privacy-safe customer names
Show privacy-safe first name / initial when available allows limited customer identification to be displayed where appropriate.
Full-screen clock
Enable Show full-screen clock to include a clock on the customer display.
Ready notification sound
Enable Play a sound when an order becomes ready to provide an audible notification.
Browser speech announcements
Enable Announce ready order numbers using browser speech if the device should announce ready order numbers using supported browser speech functionality.
Customer messaging
The display can also be customised with:
- Welcome message
- Footer message
- Promotion heading
- Promotion or notice
Ready highlight duration
Controls how long a newly ready order is highlighted.
The example uses 20 seconds.
These options allow a customer-facing collection screen to provide order progress without exposing the full operational information available to staff.
12. Display-specific branding
By default, a display inherits the global OrderFlow branding settings.
The Branding section allows those settings to be overridden for an individual Display Profile.
Enable:
Use different branding for this display
You can then configure:
Display brand name — the name shown on this particular display.
Display subtitle — additional display-specific text.
Primary colour — the main colour used by the display.
Accent colour — the secondary/accent colour.
Display logo — select an alternative image from the WordPress Media Library.
This is useful where different locations, brands or customer-facing screens require different presentation while remaining within the same OrderFlow installation.
13. Saving and previewing
After making changes, select Save display.
Use Preview or Preview display to inspect the resulting screen before deploying it to an operational device.
Previewing is particularly useful after changing:
- Visible stages
- Card sizing
- Workflow layout
- Visible customer information
- Customer TV settings
- Branding
This allows the display to be checked before it is used by staff or customers.
14. Pairing and launching a display
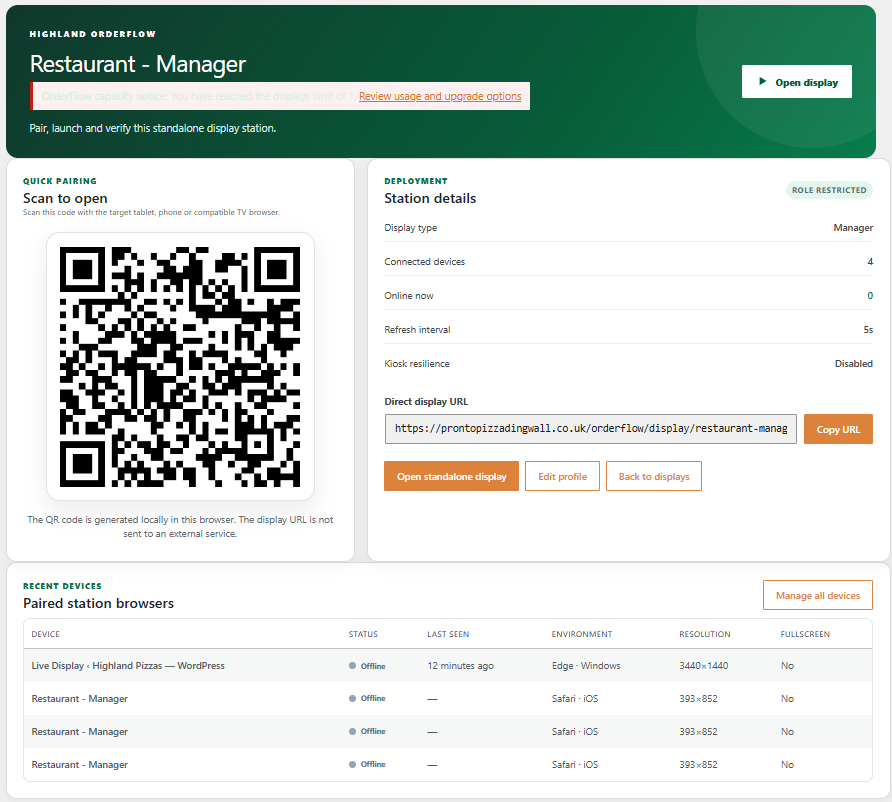
When the Display Profile is ready, return to Displays and select Pair / Launch.
This opens the station deployment page.
The page provides the information required to deploy the profile to another browser or device.
Quick pairing
A QR code is generated for the Display Profile.
Scan it using the target tablet, phone or compatible TV browser to open the station.
The QR code is generated locally in the browser. The display URL is not sent to an external QR service.
Station details
The deployment panel shows information including:
- Display type
- Number of connected devices
- Number currently online
- Refresh interval
- Kiosk resilience status
- Direct display URL
Use Copy URL if you would rather open the station manually on the target device.
Open standalone display
Select Open standalone display to launch the operational screen directly.
You can also use Open display at the top of the page.
15. Paired station browsers
The Recent devices section shows browsers and devices that have connected to the Display Profile.
Information shown includes:
- Device
- Status
- Last seen
- Environment
- Resolution
- Fullscreen status
This provides a quick way to check which devices have been associated with the display and whether they are currently online.
Select Manage all devices when you need to manage the wider device list.
Recommended setup process
For a new operational display, the normal setup sequence is:
Confirm the station appears under Recent devices and operates as expected.
- Go to OrderFlow → Displays.
- Create a profile from a template, start blank, or duplicate an existing display.
- Give the display a clear name and assign its location.
- Choose the appropriate View mode.
- Configure the workflow stages and orders the station should show.
- Select the information required on its order cards.
- Configure kiosk and security settings where required.
- Configure Customer TV options if the screen will be customer-facing.
- Apply display-specific branding if required.
- Save and Preview the display.
- Select Pair / Launch.
- Scan the QR code or open the direct display URL on the target device.
- Confirm the station appears under Recent devices and operates as expected.
Important: Think of a Workflow and a Display Profile as two separate layers. The workflow defines the operational stages an order moves through. A Display Profile determines how selected parts of that workflow are presented to a particular team, role, location or screen. This means you can create several specialised operational screens without having to duplicate the underlying workflow.